Language - C Windows Visual Studio: Difference between revisions
No edit summary |
No edit summary |
||
| Line 47: | Line 47: | ||
==Editing the Examples== | ==Editing the Examples== | ||
{{Language_-_C_Editing_The_Examples}} | {{Language_-_C_Editing_The_Examples}} | ||
==Setting up a New Project== | ==Setting up a New Project== | ||
Revision as of 22:58, 28 February 2019
| C Development Environments | ||||
|---|---|---|---|---|
|
Language - C Windows with Visual Studio Welcome to using Phidgets with C! By using C, you will have access to the complete Phidget22 API, including events. Visual Studio is an IDE provided by Microsoft that can be used to develop code in a wide variety of programming languages, including C/C++. |
Install Phidget Drivers for Windows
Before getting started with the guides below, ensure you have the following components installed on your machine:
- You will need the Phidgets Windows Drivers
Use Our Examples
One of the best ways to start programming with Phidgets is to use our example code as a guide. In order to run the examples, you will need to download and install Microsoft Visual Studio.
Now that you have Microsoft Visual Studio installed, select an example that will work with your Phidget:
Open the example project by unzipping the example folder, and opening the ExampleName.sln file in the ExampleName folder.
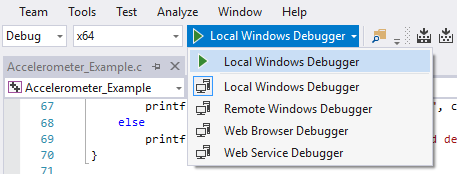
Once the project is open, start the example by pressing the Local Windows Debugger button:
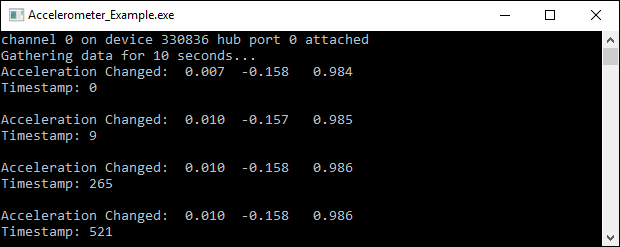
The application will open the Phidget, list basic information about the Phidget, and demonstrate the Phidget's functionality. Here is an example of an Accelerometer channel on a Spatial Phidget:
Unresolved External Symbol
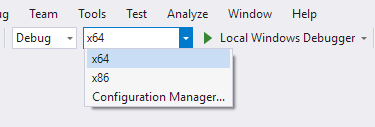
If you try to compile the program and the linker throws a number of errors called unresolved external symbol, then it is likely the project is trying to run using the wrong platform. Select your platform from the drop-down list, as shown in the image below.
You should now have the example up and running for your device. Your next step is to look at the Editing the Examples section below for information about the example and important concepts for programming Phidgets. This would be a good time to play around with the device and experiment with some of its functionality.
Editing the Examples
To get our example code to run in a custom application, simply remove the calls to AskForDeviceParameters and PrintEventDescriptions, and hard-code the addressing parameters for your application.
If you are unsure what values to use for the addressing parameters, check the Finding The Addressing Information page.
For instance:
AskForDeviceParameters(&channelInfo, (PhidgetHandle)ch);

prc = Phidget_setDeviceSerialNumber((PhidgetHandle)ch, channelInfo.deviceSerialNumber);
CheckError(prc, "Setting DeviceSerialNumber", &(PhidgetHandle)ch);

prc = Phidget_setHubPort((PhidgetHandle)ch, channelInfo.hubPort);
CheckError(prc, "Setting HubPort", &(PhidgetHandle)ch);

prc = Phidget_setIsHubPortDevice((PhidgetHandle)ch, channelInfo.isHubPortDevice);
CheckError(prc, "Setting IsHubPortDevice", &(PhidgetHandle)ch);

Phidget_setChannel((PhidgetHandle)ch, channelInfo.channel);
CheckError(prc, "Setting Channel", &(PhidgetHandle)ch);

if (channelInfo.netInfo.isRemote) {
    prc = Phidget_setIsRemote((PhidgetHandle)ch, channelInfo.netInfo.isRemote);
    CheckError(prc, "Setting IsRemote", &(PhidgetHandle)ch);

    if (channelInfo.netInfo.serverDiscovery) {
        prc = PhidgetNet_enableServerDiscovery(PHIDGETSERVER_DEVICEREMOTE);
        CheckEnableServerDiscoveryError(prc, &(PhidgetHandle)ch);
    } else {
        prc = PhidgetNet_addServer("Server", channelInfo.netInfo.hostname,
                    channelInfo.netInfo.port, channelInfo.netInfo.password, 0);
        CheckError(prc, "Adding Server", &(PhidgetHandle)ch);
    }
}
Might become:
prc = Phidget_setDeviceSerialNumber((PhidgetHandle)ch, 370114);
CheckError(prc, "Setting DeviceSerialNumber", &(PhidgetHandle)ch);

prc = Phidget_setHubPort((PhidgetHandle)ch, 2);
CheckError(prc, "Setting HubPort", &(PhidgetHandle)ch);

prc = Phidget_setIsHubPortDevice((PhidgetHandle)ch, 1);
CheckError(prc, "Setting IsHubPortDevice", &(PhidgetHandle)ch);
Notice that you can leave out any parameter not relevant to your application for simplicity.
You can then manipulate the rest of the code as your application requires. A more in-depth description of programming with Phidgets can be found in our guide on Phidget Programming Basics.
Setting up a New Project
When you are building a project from scratch, or adding Phidget functionality to an existing project, you'll need to configure your development environment to properly link the Phidget C library. To begin:
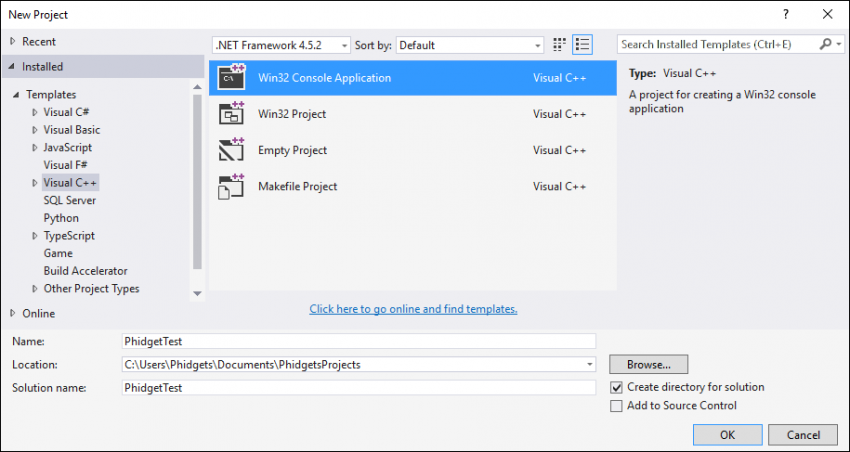
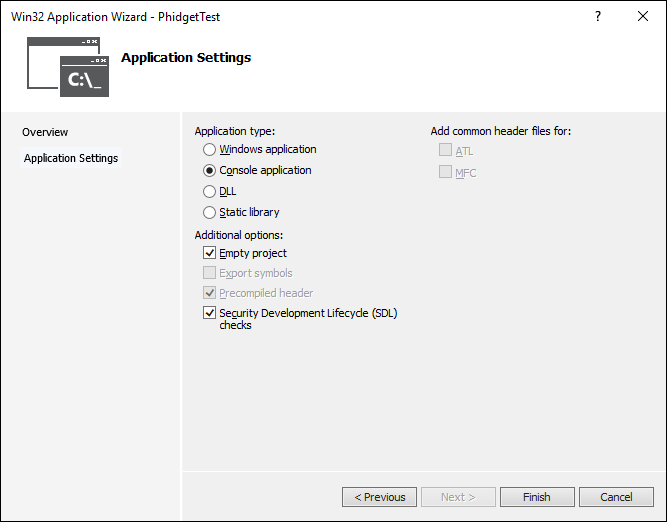
Create a new Win32 Console application:
Select an empty project and finish:
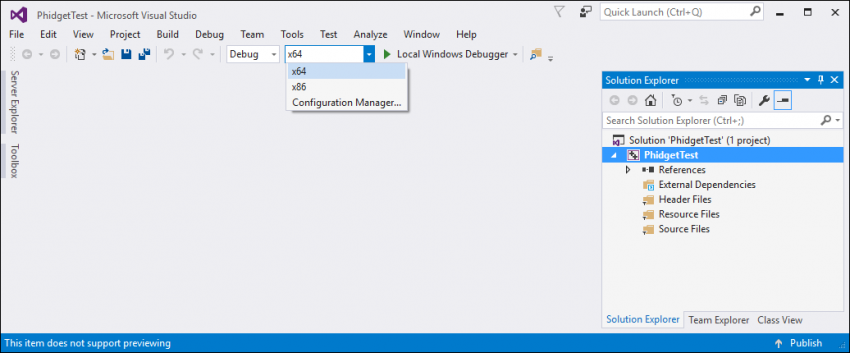
If you are using a 64-bit machine, select x64, otherwise, keep x86:
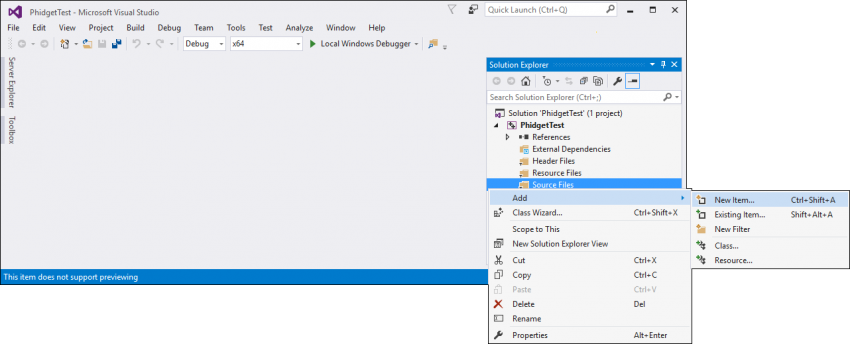
Next, add a new item to your source folder:
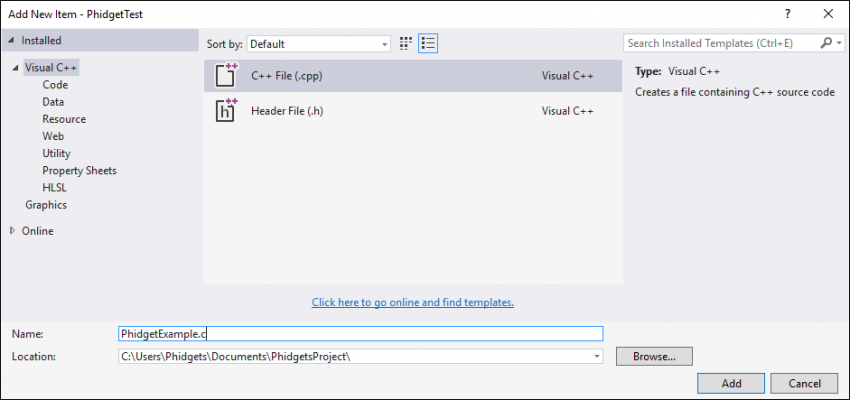
Give the source file a descriptive name and continue:
Access the project's properties:
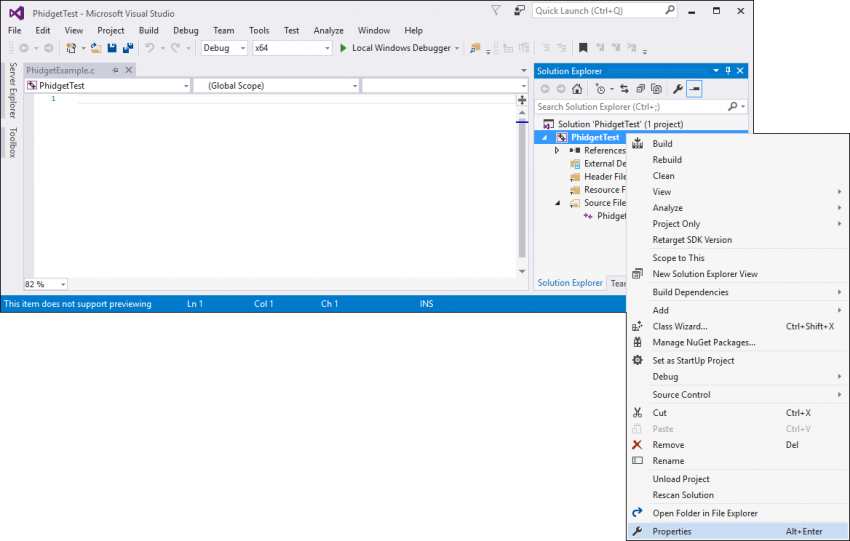
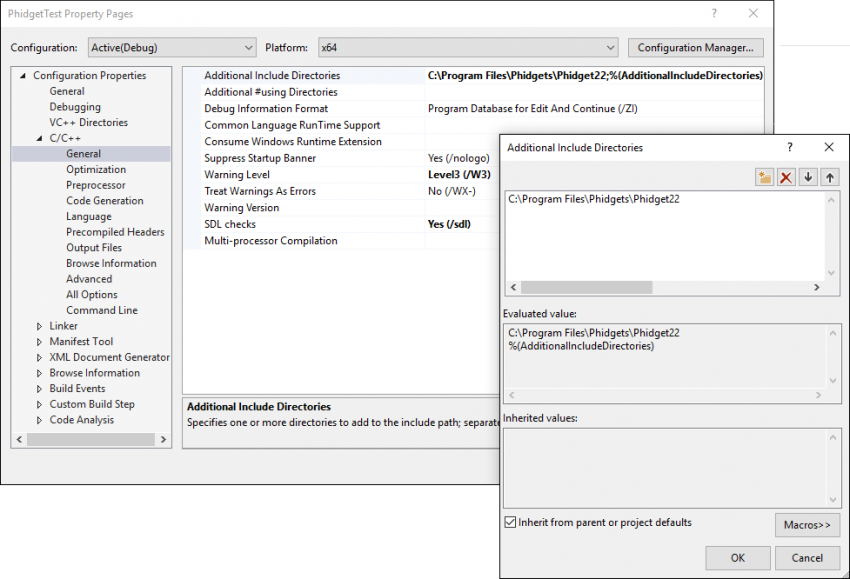
Next, navigate to Configuration Properties -> C/C++ -> General and add the following line to the additional include directories:
- C:\Program Files\Phidgets\Phidget22
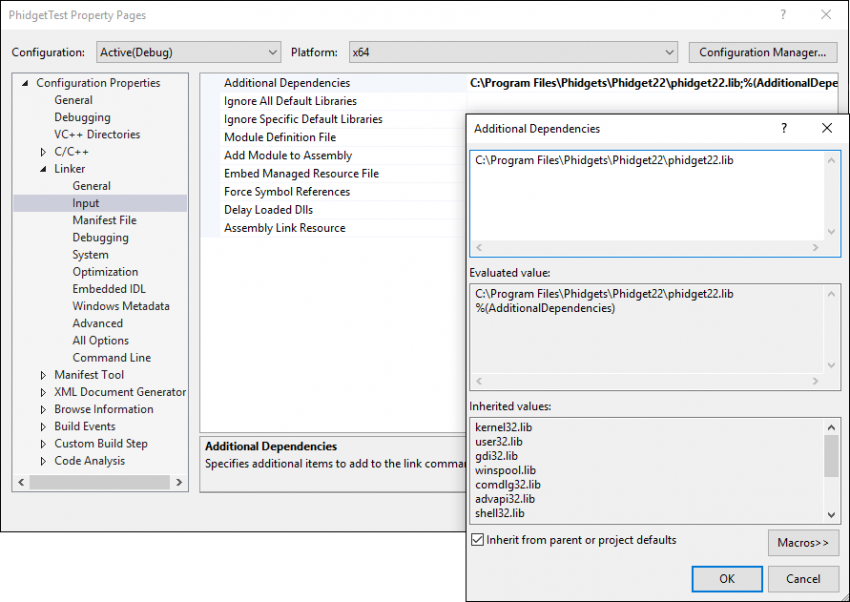
Navigate to Configuration Properties -> Linker -> Input and add the following line to the additional dependencies:
- C:\Program Files\Phidgets\Phidget22\phidget22.lib
Finally, include the Phidget library in your code, and any other header files:
#include <phidget22.h>
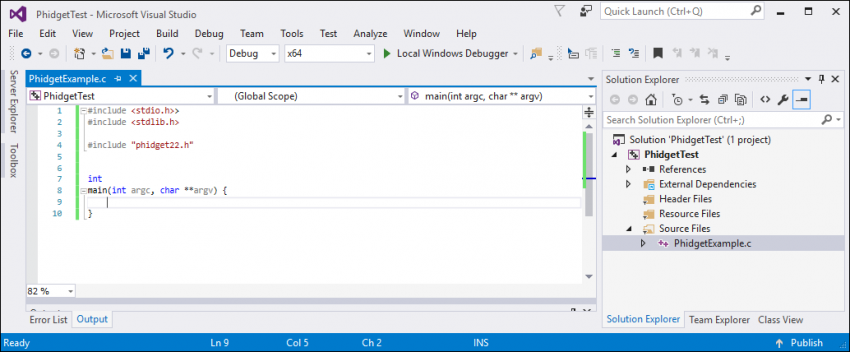
Success! The project now has access to Phidgets.
What's Next?
Now that you have set up Phidgets to work with your programming environment, we recommend you read our guide on Phidget Programming Basics to learn the fundamentals of programming with Phidgets.![]()
