SBC4204 User Guide: Difference between revisions
| (One intermediate revision by the same user not shown) | |||
| Line 29: | Line 29: | ||
By default, you will probably see the following output: | By default, you will probably see the following output: | ||
{{Code|1 snd_usb_audio}} | {{Code|1 snd_usb_audio}} | ||
| Line 41: | Line 42: | ||
You can either test using an audio file (.wav or .mp3) on a USB stick, or you can enter the URL of an internet radio station. | You can either test using an audio file (.wav or .mp3) on a USB stick, or you can enter the URL of an internet radio station. | ||
[[Image:mpg123.jpg|link=]] | |||
At this point, you should be able to hear audio coming from the speaker or headphones that you have plugged into the USB adapter! | At this point, you should be able to hear audio coming from the speaker or headphones that you have plugged into the USB adapter! | ||
Latest revision as of 16:45, 6 November 2019

| |
| Go to this device's product page |
Getting Started
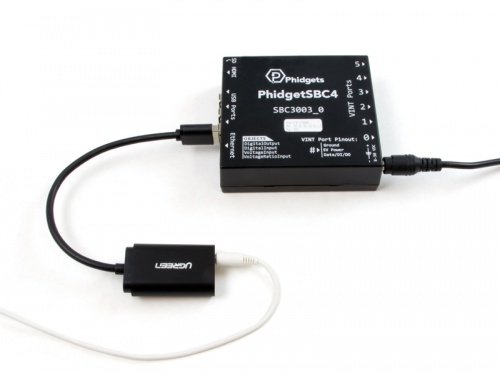
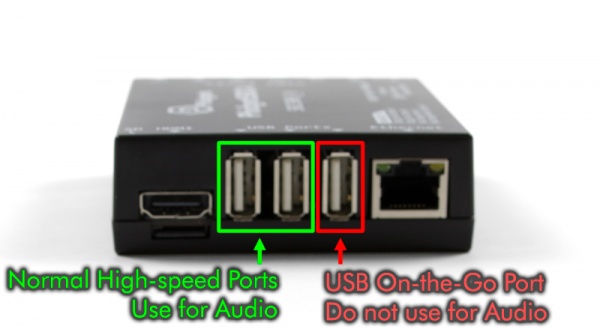
The SBC4204 USB Audio adapter provides sound capabilities to the PhidgetSBC4. The audio adapter offers two integrated channels - one for speakers or headphones, and one for a microphone. Using this product requires a working knowledge of Linux. To begin, make sure that you plug it into one of the SBC4's USB 2.0 ports, not the USB on-the-go port:

Once you've plugged it in, you can type dmesg | tail -n 10 into the terminal.
Somewhere in the output, you should see a line that says
usbcore: registered new interface driver snd-usb-audio
This indicates that the device has been recognized by your system.
Install mpg123
In order to test that the adapter is working properly, you'll need a program that can play sound. We recommend installing mpg123:
apt-get install mpg123
If the test performed in the later section produces choppy audio, you can try using mpg321 or vlc instead.
Configure Sound Card Index
Enter the following command into the terminal: cat /proc/asound/modules
By default, you will probably see the following output:
1 snd_usb_audio
This means our USB sound card index is set to 1, which means most audio programs will fail when they try to access index 0 which doesn't exist. In order to change the sound card index, navigate to /etc/modprobe.d/ and create a new file there named alsa-base.conf with the following contents:
options snd-usb-audio index=0
This single line is all that is needed. Once you've created this file, you must reset the SBC for the changes to take effect. You can reset through the web interface or by cycling power. When it boots back up, you can try the cat /proc/asound/modules command again to see if the index has successfully changed to 0.
Test the Audio
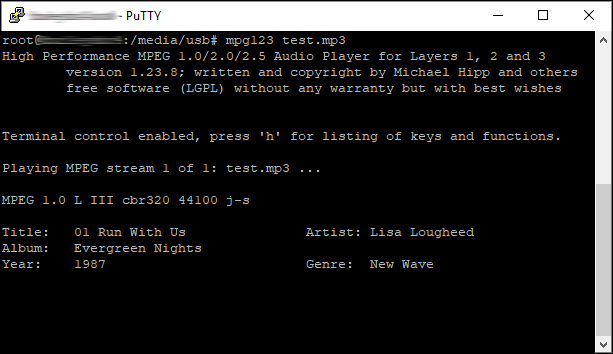
You can either test using an audio file (.wav or .mp3) on a USB stick, or you can enter the URL of an internet radio station.

At this point, you should be able to hear audio coming from the speaker or headphones that you have plugged into the USB adapter!
