Template:UgSoundSensor: Difference between revisions
From Phidgets Support
(Created page with "===Sound Pressure Level Sensor=== link=|900px When you double click on a Sound Sensor object, a window like the one pictured will open. * In the...") |
No edit summary |
||
| (One intermediate revision by the same user not shown) | |||
| Line 1: | Line 1: | ||
===Sound | ===Sound Sensor=== | ||
Double-click on the Sound Sensor object, labelled ''Sound Phidget'', in order to run the example: | |||
[[Image:SPL_Example.jpg|link=|900px|center]] | |||
{{UGExampleDescription}} | |||
* Modify the change trigger and/or data interval value by dragging the sliders. For more information on these settings, see the [[Data_Rate_and_Change_Trigger|data interval/change trigger]] page. | |||
* Use the ''SPL Range'' drop-down menu to select the lowest possible range that the level of sound you're measuring will fall within (smaller ranges have higher resolution). | |||
* | *Use the ''Speaker Beep'' tool to emit a 2.5 second beep of the specified frequency. View the frequency bands and see how they respond. | ||
* | |||
Latest revision as of 22:47, 20 June 2017
Sound Sensor
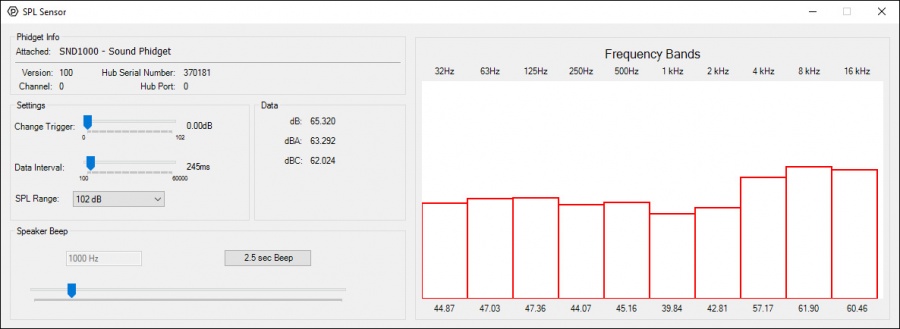
Double-click on the Sound Sensor object, labelled Sound Phidget, in order to run the example:

General information about the selected object will be displayed at the top of the window. You can also experiment with the following functionality:
- Modify the change trigger and/or data interval value by dragging the sliders. For more information on these settings, see the data interval/change trigger page.
- Use the SPL Range drop-down menu to select the lowest possible range that the level of sound you're measuring will fall within (smaller ranges have higher resolution).
- Use the Speaker Beep tool to emit a 2.5 second beep of the specified frequency. View the frequency bands and see how they respond.
