Language - Max: Difference between revisions
| Line 64: | Line 64: | ||
The above screenshot is for the PhidgetInterfaceKit. Now, it is time to explain how to operate the Phidget. If you are using a different device, your example program will be different, but the idea is the same. | The above screenshot is for the PhidgetInterfaceKit. Now, it is time to explain how to operate the Phidget. If you are using a different device, your example program will be different, but the idea is the same. | ||
The Max object is called PhidgetInterfaceKit, which | The Max object is called PhidgetInterfaceKit, which can be seen in the center of the screen. Other objects are connected to the inputs and outputs of the PhidgetInterfaceKit object. The input objects will either cause the device to change or request for a property to be retrieved. The output objects return the retrieved information. All the supported features of the device are shown in the {{Code|.help}} file. | ||
Try it for yourself! Click on the {{Code | getSerial}} message box to send a message to the PhidgetInterfaceKit object. You should see the last output object of {{Code|route}} changed to the serial number of your device. All devices support the {{Code|getSerial}} object, and is the easiest way to determine if your device is hooked up and the Phidget libraries correctly installed onto your computer. | Try it for yourself! Click on the {{Code | getSerial}} message box to send a message to the PhidgetInterfaceKit object. You should see the last output object of {{Code|route}} changed to the serial number of your device. All devices support the {{Code|getSerial}} object, and is the easiest way to determine if your device is hooked up and the Phidget libraries correctly installed onto your computer. | ||
Revision as of 22:35, 25 January 2012
![]() Max/MSP, developed by Cycling74 is a visual programming language for creating music and media applications.
Max/MSP, developed by Cycling74 is a visual programming language for creating music and media applications.
Introduction
Only Max/MSP 4.5 or higher is supported.
Quick Downloads
Just need the Max/MSP drivers, libraries, and examples? Here they are:
API Documentation:
Should we include the next 2 links?
- General API (more help on functions common to all Phidgets)
- Device Specific APIs (more help on functions specific to your Phidget)
Max/MSP Library and Example Code:
Libraries and Drivers:
- 32 bit Windows (drivers, with libraries)
- 64 bit Windows (drivers, with libraries)
- General Linux Libraries ( Linux Library Setup Instructions)
- General Mac OSX Libraries ( Mac OS X Library Setup Instructions)
Getting started with Max/MSP
If you are new to writing code for Phidgets, we recommend starting by running, then modifying existing examples. This will allow you to:
- Make sure your libraries are properly linked
- Go from source code to a test application as quickly as possible
- Ensure your Phidget is hooked up properly
Instructions are divided up by operating system. Choose:
Windows(2000/XP/Vista/7)
Libraries
Description
Max/MSP programs on Windows depend on the following files, which the installers above put onto your system:
phidget21.dllcontains the actual Phidgets library, which is used at run-time. If you used our installer, it's already correctly placed inC:\Windows\System32. It can be manually installed - check our Manual Installation instructions.
You will also need one of the following two files, depending on the .NET framework version you are targeting:
PhidgetXXX.mxois the Phidgets library for your specific device. XXX denotes the name of your device, Please make sure the.mxefile corresponds with the device you are using. For example, if you are using the PhidgetInterfaceKit, you will need thePhidgetInterfaceKit.mxeIt is to be placed in the same directory as your.helpfile
Use Our Examples
Please start by downloading the Max/MSP Examples. These examples were written in Visual Studio 2005 and 2008, but Visual Studio 2010 will easily upgrade them.
To run the examples, you first download them from above and unpack them into a folder. Here, you will find example programs, in .help format for all the devices. If you aren't sure what the software example for your device is called, check the software object listed in the Getting Started guide for your device.
The only thing left to do is to run the examples! Open the .help file in the Max environment.
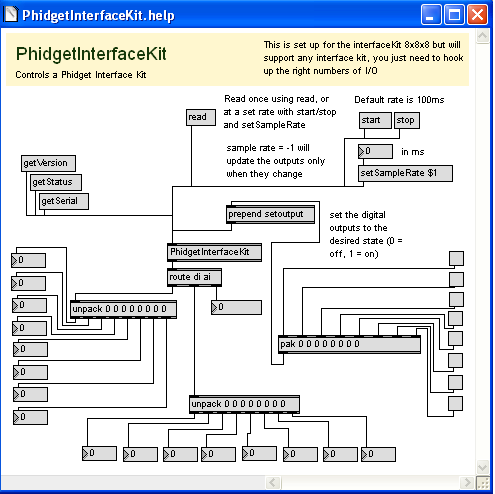
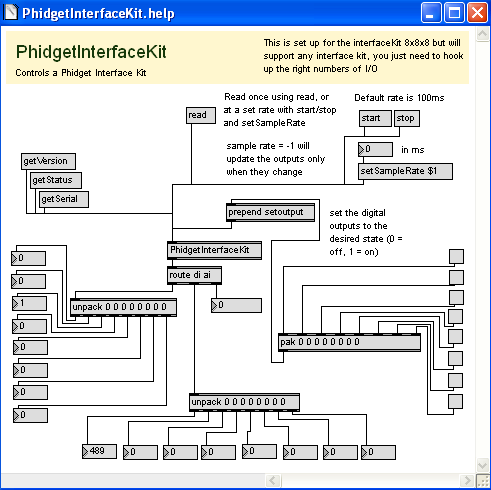
The above screenshot is for the PhidgetInterfaceKit. Now, it is time to explain how to operate the Phidget. If you are using a different device, your example program will be different, but the idea is the same.
The Max object is called PhidgetInterfaceKit, which can be seen in the center of the screen. Other objects are connected to the inputs and outputs of the PhidgetInterfaceKit object. The input objects will either cause the device to change or request for a property to be retrieved. The output objects return the retrieved information. All the supported features of the device are shown in the .help file.
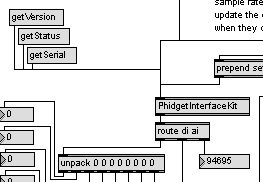
Try it for yourself! Click on the getSerial message box to send a message to the PhidgetInterfaceKit object. You should see the last output object of route changed to the serial number of your device. All devices support the getSerial object, and is the easiest way to determine if your device is hooked up and the Phidget libraries correctly installed onto your computer.
If your example contains the read object, click on it. This will return all the device specific values to the screen.
If your example contains the start object, you can also continuously poll for events. Set the sample rate input for the setSampleRate object. Then, press the start object. Upon events triggering, certain values will be continuously returned to the screen. Press the stop object to stop the sampling.
For the PhidgetInterfaceKit example, there is also a setoutput object. Clicking on the check boxes will cause the digital outputs of the PhidgetInterfaceKit device to change. Your example may contain device specific objects to click on. See for yourself what they do!
Once you have the Max/MSP examples running, we have a teaching section below to help you follow them.
Write Your Own Code
When you are building a project from scratch, or adding Phidget function calls to an existing project, you'll need to configure the Max/MSP environment to properly link the Phidget LiveCode libraries. To begin:
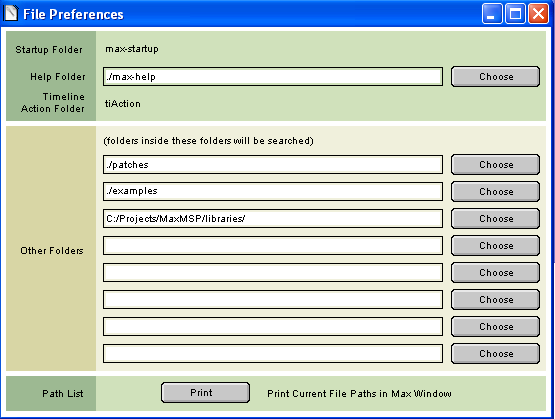
In addition to placing the .mxe file in the same directory as the patcher, you can also place the .mxe anywhere in the Max/MSP class path. You can verify the class paths by navigating to Options | File Preferences.

The best way to start writing your patch is to modify the examples, and saving as a .pat file.
However, if you wish to start a new patch. All you need to do is create an object named PhidgetXXX where XXX is the name of your device. For example, the PhidgetRFID device will have the PhidgetRFID object name.
The project now has access to the Phidget21 function calls and you are ready to begin coding.
The same teaching section which describes the examples also has further resources for programming your Phidget.
Mac OS X
Max/MSP has excellent support on Mac OS X.
The first step in using C# on Mac is to install the Phidget libraries. Compile and install them as explained on the getting started guide for your device. Then, the OS - Mac OS X page also describes the different Phidget files, their installed locations, and their roles....
Follow The Examples
By following the instructions for your operating system and compiler above, you probably now have a working example and want to understand it better so you can change it to do what you want. This teaching section has resources for you to learn from the examples and write your own.
Next, comes our API information. These resources outline the Max/MSP Phidget functions:
Template:UsingAPhidgetInCodeGeneral
Example Flow
Code Snippets
Common Problems and Solutions/Workarounds
Here you can put various frequent problems and our recommended solutions.


