Cable Connector Guide: Difference between revisions
(Created page with "The CBL44XX cable connectors allow you to connect cables together quickly, without the need for soldering, and in a waterproof fashion. There are a lot of pieces to these con...") |
No edit summary |
||
| Line 1: | Line 1: | ||
[[Category:Linked From Website]] | |||
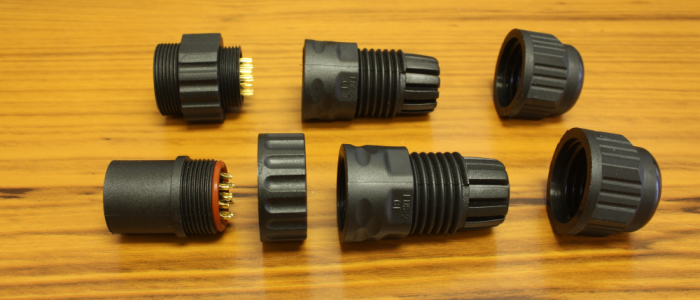
The CBL44XX cable connectors allow you to connect cables together quickly, without the need for soldering, and in a waterproof fashion. There are a lot of pieces to these connectors though and they aren't the most obvious things to assemble, so let's quickly run through the process step by step. The first step is to totally disassemble the connector and solder your conductors on to the pin contacts. Unscrew all the parts (each connector should have 3 or 4 parts depending on if it's male or female). | The CBL44XX cable connectors allow you to connect cables together quickly, without the need for soldering, and in a waterproof fashion. There are a lot of pieces to these connectors though and they aren't the most obvious things to assemble, so let's quickly run through the process step by step. The first step is to totally disassemble the connector and solder your conductors on to the pin contacts. Unscrew all the parts (each connector should have 3 or 4 parts depending on if it's male or female). | ||
Latest revision as of 20:27, 5 May 2017
The CBL44XX cable connectors allow you to connect cables together quickly, without the need for soldering, and in a waterproof fashion. There are a lot of pieces to these connectors though and they aren't the most obvious things to assemble, so let's quickly run through the process step by step. The first step is to totally disassemble the connector and solder your conductors on to the pin contacts. Unscrew all the parts (each connector should have 3 or 4 parts depending on if it's male or female).

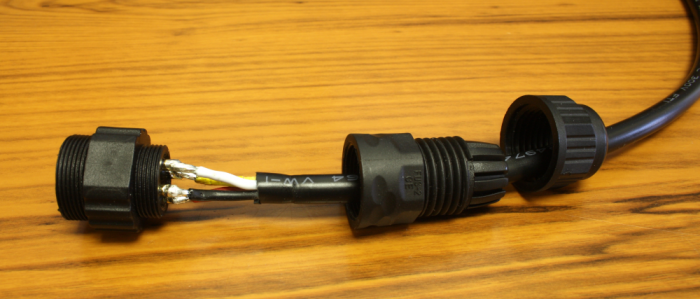
Slide the rear 2/3 sections onto the cable and down out of the way. Then solder your conductors to the gold half cylinders on the final section.

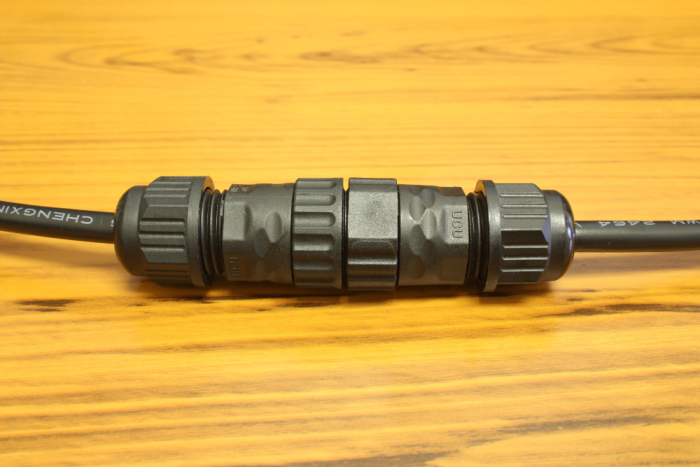
Now you can screw the sections back together and you have completed one half of the connection. Repeat this for the other cable and you will be able to join them together by plugging them in and locking them closed with the threaded shroud.

