Template:IOS use our examples: Difference between revisions
(Created page with "With ''Phidgets'' as your target, navigate to ''Build Settings'' and find the ''Header Search Paths'' setting: link=|center The header file phidget2...") |
No edit summary |
||
| Line 31: | Line 31: | ||
Here is an example of what the | Here is an example of what the VoltageInput example looks like: | ||
[[Image:ios_example_run.png|link= | 500px |center]] | [[Image:ios_example_run.png|link= | 500px |center]] | ||
You should now have the example up and running for your device. Play around with the device and experiment with some of the functionality. When you are ready, the next step is configuring your project and writing your own code! | You should now have the example up and running for your device. Play around with the device and experiment with some of the functionality. When you are ready, the next step is configuring your project and writing your own code! | ||
Revision as of 15:45, 9 June 2017
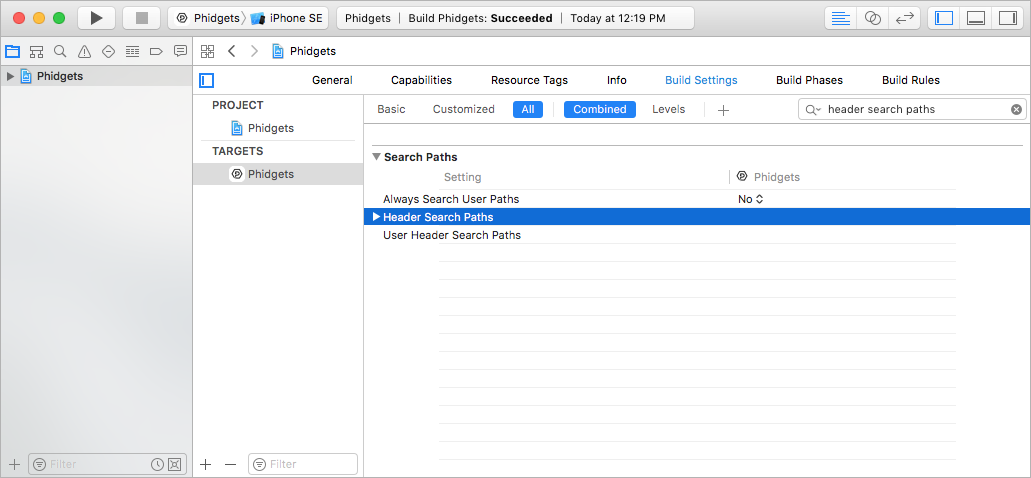
With Phidgets as your target, navigate to Build Settings and find the Header Search Paths setting:
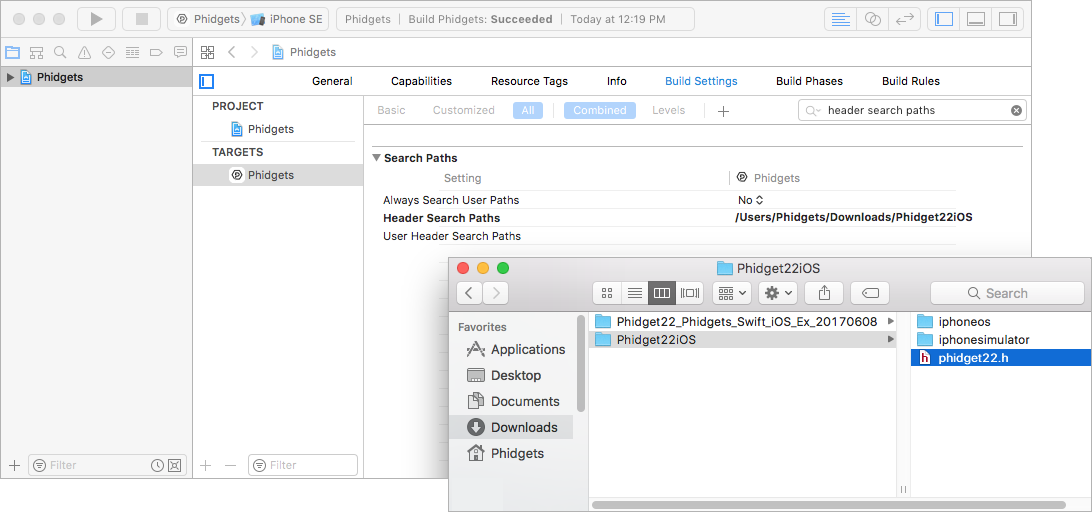
The header file phidget22.h was included in the Phidget iOS libraries download. Add a reference to the folder that contains phidget22.h under the Header Search Paths setting:
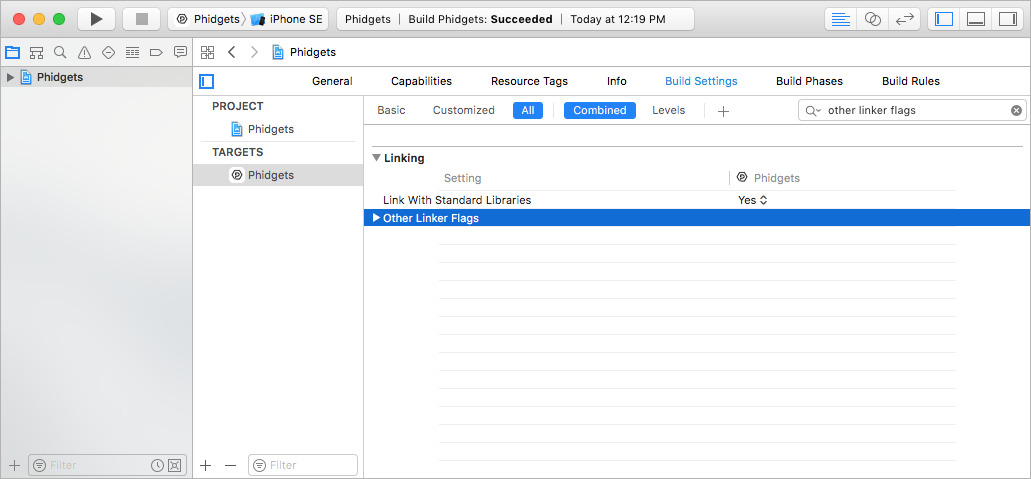
Next, find the Other Linker Flags setting:
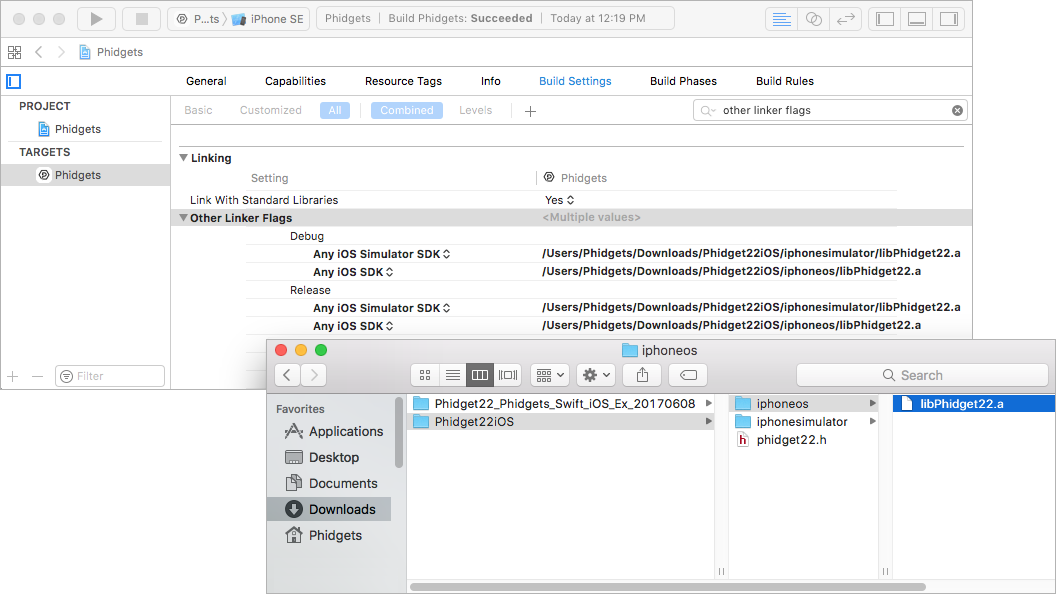
Add a reference to the Phidget libraries that were included in the Phidget iOS libraries download:
Now that the library files are linked, simply select the type of device you would like the application to run on and press play:
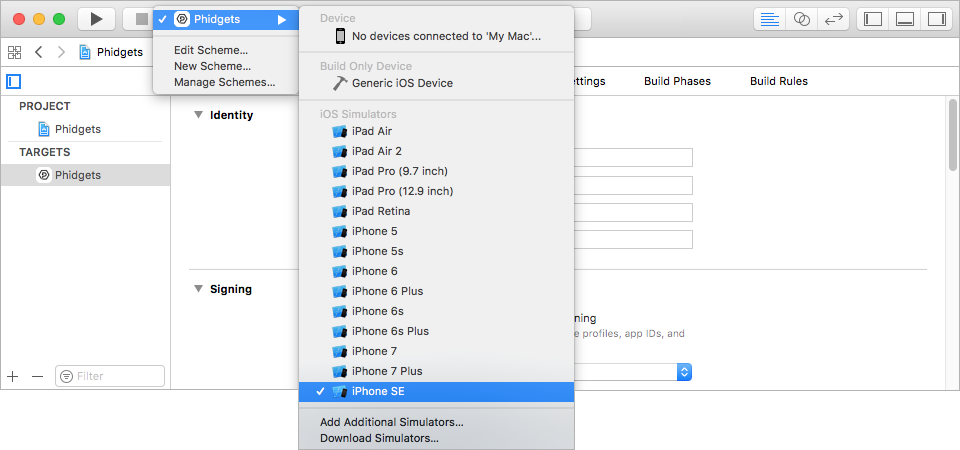
Note: you must be an Apple Developer in order to download the application to your iOS device.
The application will detect any servers that are currently online and have Phidgets connected. Here is an example output:
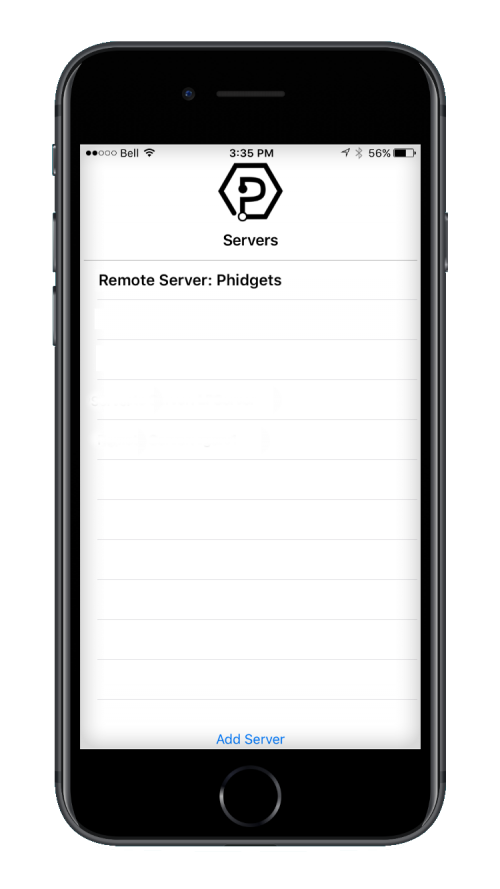
After confirming that the Phidgets Example is working, you can proceed to run the example for your specific device. Do this by selecting your server and then continue to navigate through the hierarchy until you reach your device. After tapping your device, the example will show automatically. Currently, we have example programs for the following classes:
- DigitalInput
- DigitalOutput
- VoltageInput
- VoltageRatioInput
Here is an example of what the VoltageInput example looks like:
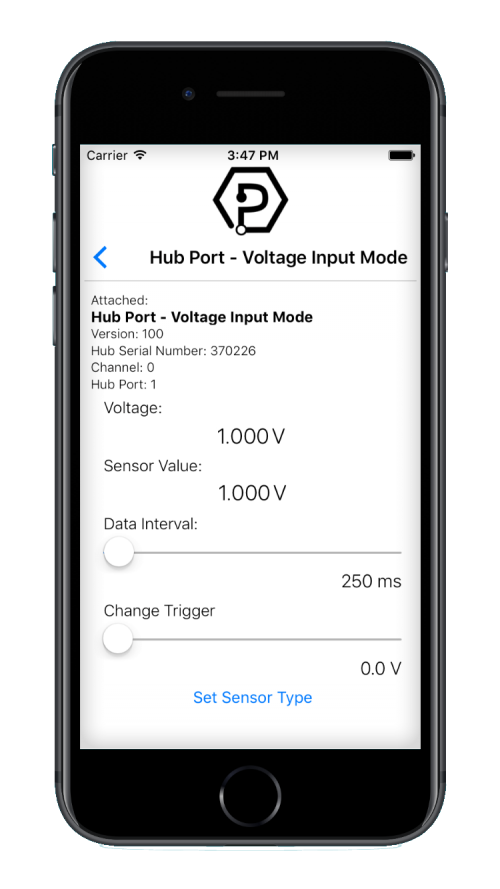
You should now have the example up and running for your device. Play around with the device and experiment with some of the functionality. When you are ready, the next step is configuring your project and writing your own code!
