Phidget Program Outline
From Phidgets Support
Phidget Programming Basics: Phidget Program Outline Table of Contents
3 . Phidget Program Outline
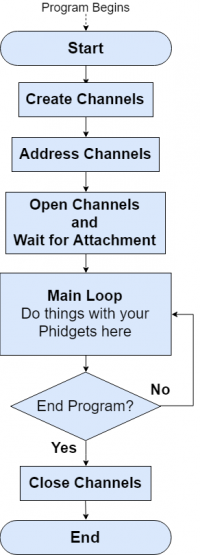
Every Phidget channel you use in any program will follow the same life cycle:
- Create a channel: Make a variable to keep track of your Phidget
- Address the channel: Set some basic parameters to indicate which Phidget to connect to.
- You can specify as much, or as little as you deem necessary. You can even use a Phidget without specifying any parameters, if your system is simple enough.
- Open the channel: Opening the channel will begin trying to match a physical Phidget channel to your software channel.
- Detect when the channel is attached: Your program must wait until a physical Phidget channel has been attached to your software channel.
- The attachment process is handled automatically, and will attach to the first available Phidget channel that matches all your specified addressing parameters.
- A channel is attached when the Phidget libraries link a physical Phidget channel to your software channel.
- Waiting for attachment can be handled automatically as part of opening the channel or separately, as best suits your program.
- Do things with the channel: Send commands to and receive data from your Phidget.
- This section will encompass the majority of your program. The Phidget API / libraries will make this process as straightforward as possible, and is similar across all types of Phidgets.
- Close the channel: Once your program is done, you close the Phidget channel.
- This frees up the Phidget for the next program that might need it.
For a closer look at the parts of a Phidget program, the following pages will dissect the parts of a Phidget program in more detail. Small code snippets are provided for each step to provide a representation of the code.

