OS - Windows
Getting Started with WindowsWelcome to using Phidgets with Windows! If you are ready to go, the first step in creating Windows applications with Phidgets is installing our libraries. |
Install
To install our libraries, download the installer for your system:
Before installing our libraries, be sure to read our Software License. If you need to access an old version of the drivers, click here.
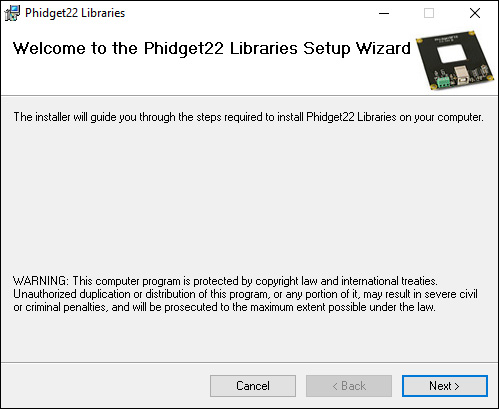
When prompted, continue with the installation:

The libraries are now installed on your machine. Next, let's verify that they are working properly.
For instructions on installing our libraries without an installer, check out the OS - Windows Advanced Information page.
Verify
The best way to verify that your libraries are working properly is to use the Phidget Control Panel. The control panel is a powerful tool that will help you develop your Phidgets applications. Get started by following the instructions below:
Find the ![]() icon in the taskbar. If it is not there, open up the start menu and search for Phidget Control Panel
icon in the taskbar. If it is not there, open up the start menu and search for Phidget Control Panel
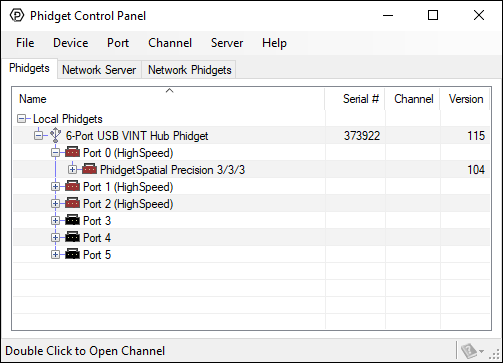
Next, double-click on the Phidgets icon to bring up the Phidget Control Panel. You can now see all the Phidgets that are plugged into your machine, as well as any Phidgets that are on the network:

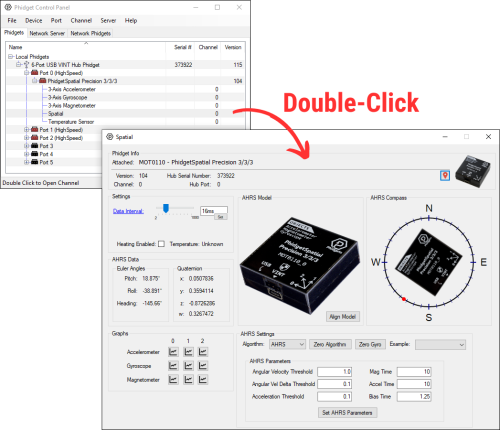
Click on the + beside a device to expand it so that you can see all available channels. Double-click on one of these channels to open up a window that lets you interact with it.:

The Phidget Control Panel can be used for testing devices, updating firmware, enabling a Phidget Network Server, and more! Visit the Phidget Control Panel page for more information.
Your Phidget is now able to communicate with your development machine. The next step is selecting a programming language so you can start to write some code!
Programming
Ready to write some code? Select one of the programming languages below:
Advanced Information
For information on advanced Windows topics, such as installing our libraries without an installer, installing our libraries without an internet connection, or using Windows in a Virtual Machine, check our page on Windows Advanced Information


