Phidget Control Panel
Getting Started with the Phidget Control Panel
The Phidget Control Panel is a powerful tool that will help you develop your Phidgets applications. With the Phidget Control Panel, you can see any/all Phidgets that are attached to your machine (or a remote machine), update your Phidget's firmware, manage a Phidget Network Server, and more!
If you are using a Windows machine, keep reading. If you are using a macOS machine, jump ahead to the macOS section.
Windows
If you haven't already, follow the getting started with Windows section on the Windows OS page. There you will install the Phidget libraries and learn how to open the Phidget Control Panel.
Next, open the Phidget Control Panel and keep reading!
Phidgets tab
After opening the Phidget Control Panel, you should see something like this:
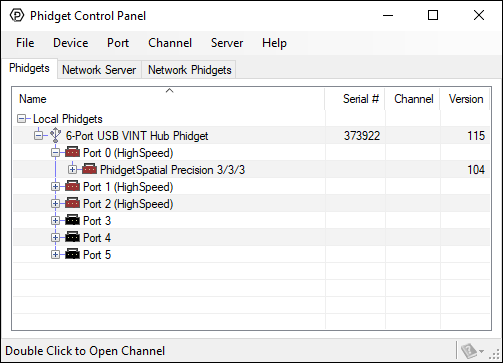
The Phidgets tab will list all Phidgets (and associated objects) that are connected to your machine, as well as the following information:
- Serial number: allows you to differentiate between similar Phidgets.
- Channel: allows you to differentiate between similar objects on a Phidget.
- Version number: corresponds to the firmware version your Phidget is running.
Double-click on a Phidget device to run an example program:
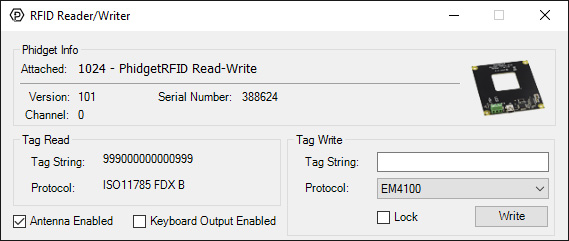
The screenshot above shows the example application for the 1024 - PhidgetRFID Read-Write. These examples are intended for demonstration and debugging purposes.
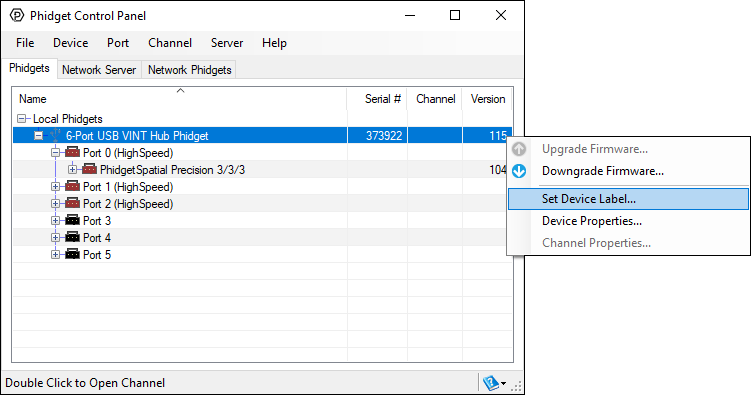
Setting a label
Right-click on a Phidget to set a label. See setting a label for more information about how to use labels with Phidgets.
Updating Firmware
If a Phidget shows up in red on the list in the Phidgets tab, it means the firmware is out of date. Double click on the Phidget to be given an option to apply the update.
Logging
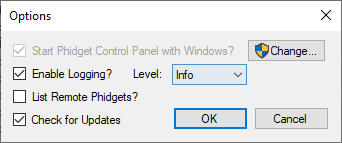
The Phidget Control Panel keeps a log file of all errors, warnings, and other information related to its operation. This information can be useful if you're having problems with your Phidgets, but you're not sure what's going wrong. To enable logging, first navigate to File -> Options...
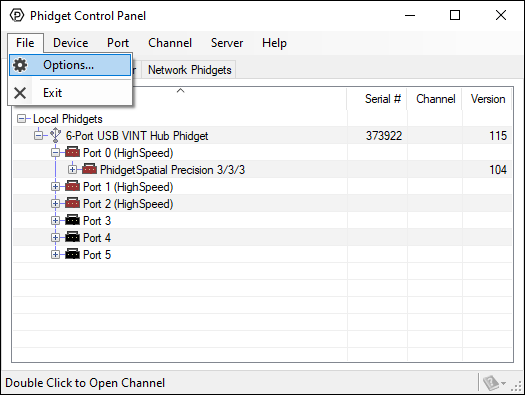
Next, check the box beside Enable Logging. From the Level drop-down menu, you can select how detailed you want the output to be:
- Info: default/recommended setting. Will log general information such as errors, attach/detach events, etc.
- Error/Warning: will only log error messages/warning messages. Useful for keeping log files small in size.
- Debug: for use with Debug version of library.
- Critical: will only log critical messages (e.g. if program crashes)
- Verbose: will log everything. Not recommended for normal use.
To view the log files, click on Logs in the bottom right corner of the Phidget Control Panel. You can also find it by navigating to the following location:
- C:\ProgramData\Phidgets\logs
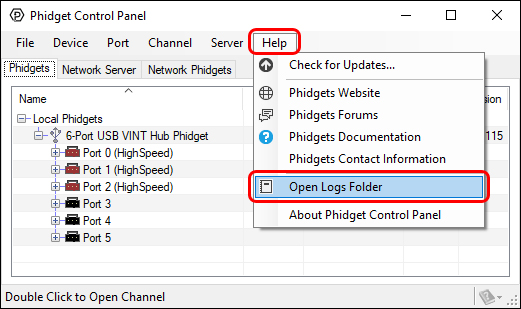
There is a separate log file for each example, as well as the Network Server, to make it easier to find messages that are relevant to the part you're debugging.
Network Server tab
To get started, click on the Network Server tab:
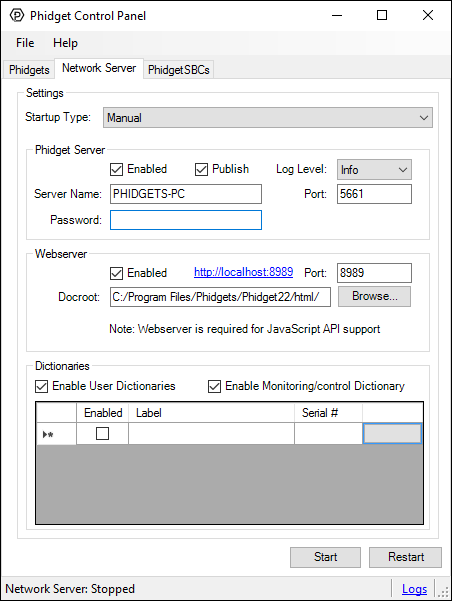
There are quite a few settings here, so we will go through them one at a time:
Settings
- Startup Type: determines when the Phidget Network Server will start.
- Automatic: the Phidget Network Server will start automatically when Windows boots.
- Manual: the Phidget Network Server will start only when you click the Start button at the bottom of the Window, or, if another service starts it.
- Disabled: mode means the Phidget Network Server will stay off, regardless of what tries to start it.
Phidget Server Settings
- Enabled: enable the Phidget server. When you enable the Phidget Server, other computer on the network will be able to access the Phidgets that are connected to your computer.
- Publish: WAITING ON INFO FOR THIS PART (LUCAS)
- Server Name: your server name will allow you to identify your Phidget Server from others on the network.
- Password (optional): prevent unauthorized computers on the network from accessing the Phidgets connected to your computer by setting a password.
- Log Level: defaults to Info. See logging section above for more information.
- Port: The port used by the Phidget Network Server (defaults to 5661).
Webserver Settings
- Enabled: enable the Webserver. The Webserver allows you to host a webpage that will have access to the Phidgets through languages like JavaScript.
- 'Docroot: specifies the docroot path.
- Port: The port used by the Webserver (defaults to 8989).
Dictionaries Settings
- Enable User Dictionaries: in order to create/use a Phidget Dictionary with the Phidget Control Panel, make sure this setting is enabled.
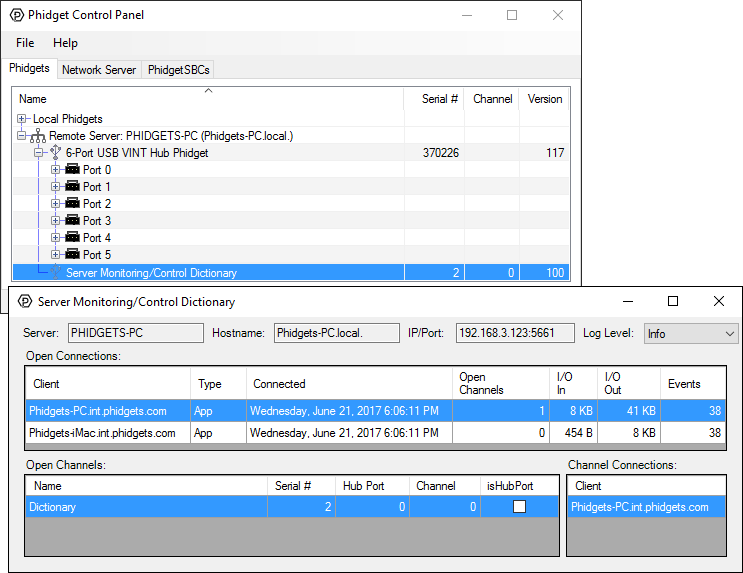
- Enable Monitoring/control Dictionary: by enabling this setting, you can view incoming/outgoing traffic related to your Phidget Network Server. Here is an example:
PhidgetSBCs Tab
The last tab is the PhidgetSBCs tab, which displays the complete list of any PhidgetSBCs connected to the network.
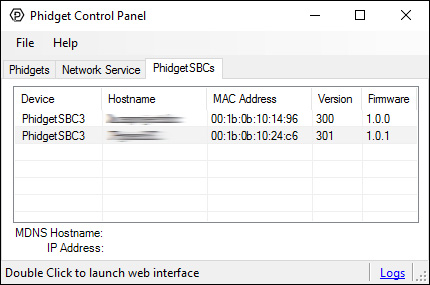
You can double click on the PhidgetSBC to bring up the PhidgetSBC Administration Console log-in page in your default browser.
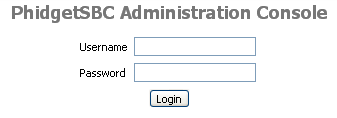
The PhidgetSBC Administration Console is where you can go to configure the PhidgetSBC. For more details, please see the User Guide for your SBC.
macOS
Once the Phidget libraries are installed using the installer, open up the Finder and find the Phidget Control Panel in the Applications list.
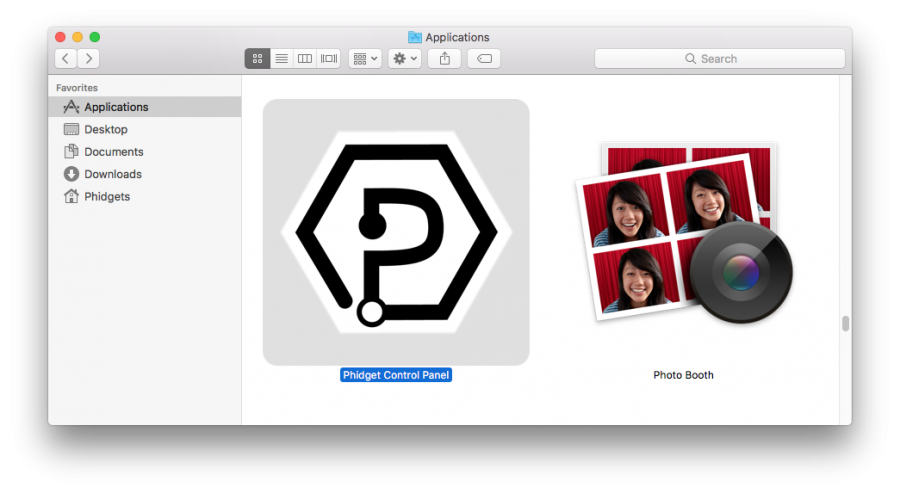
Double click on the Phidgets icon to bring up the Phidget Control Panel.
Phidgets Tab
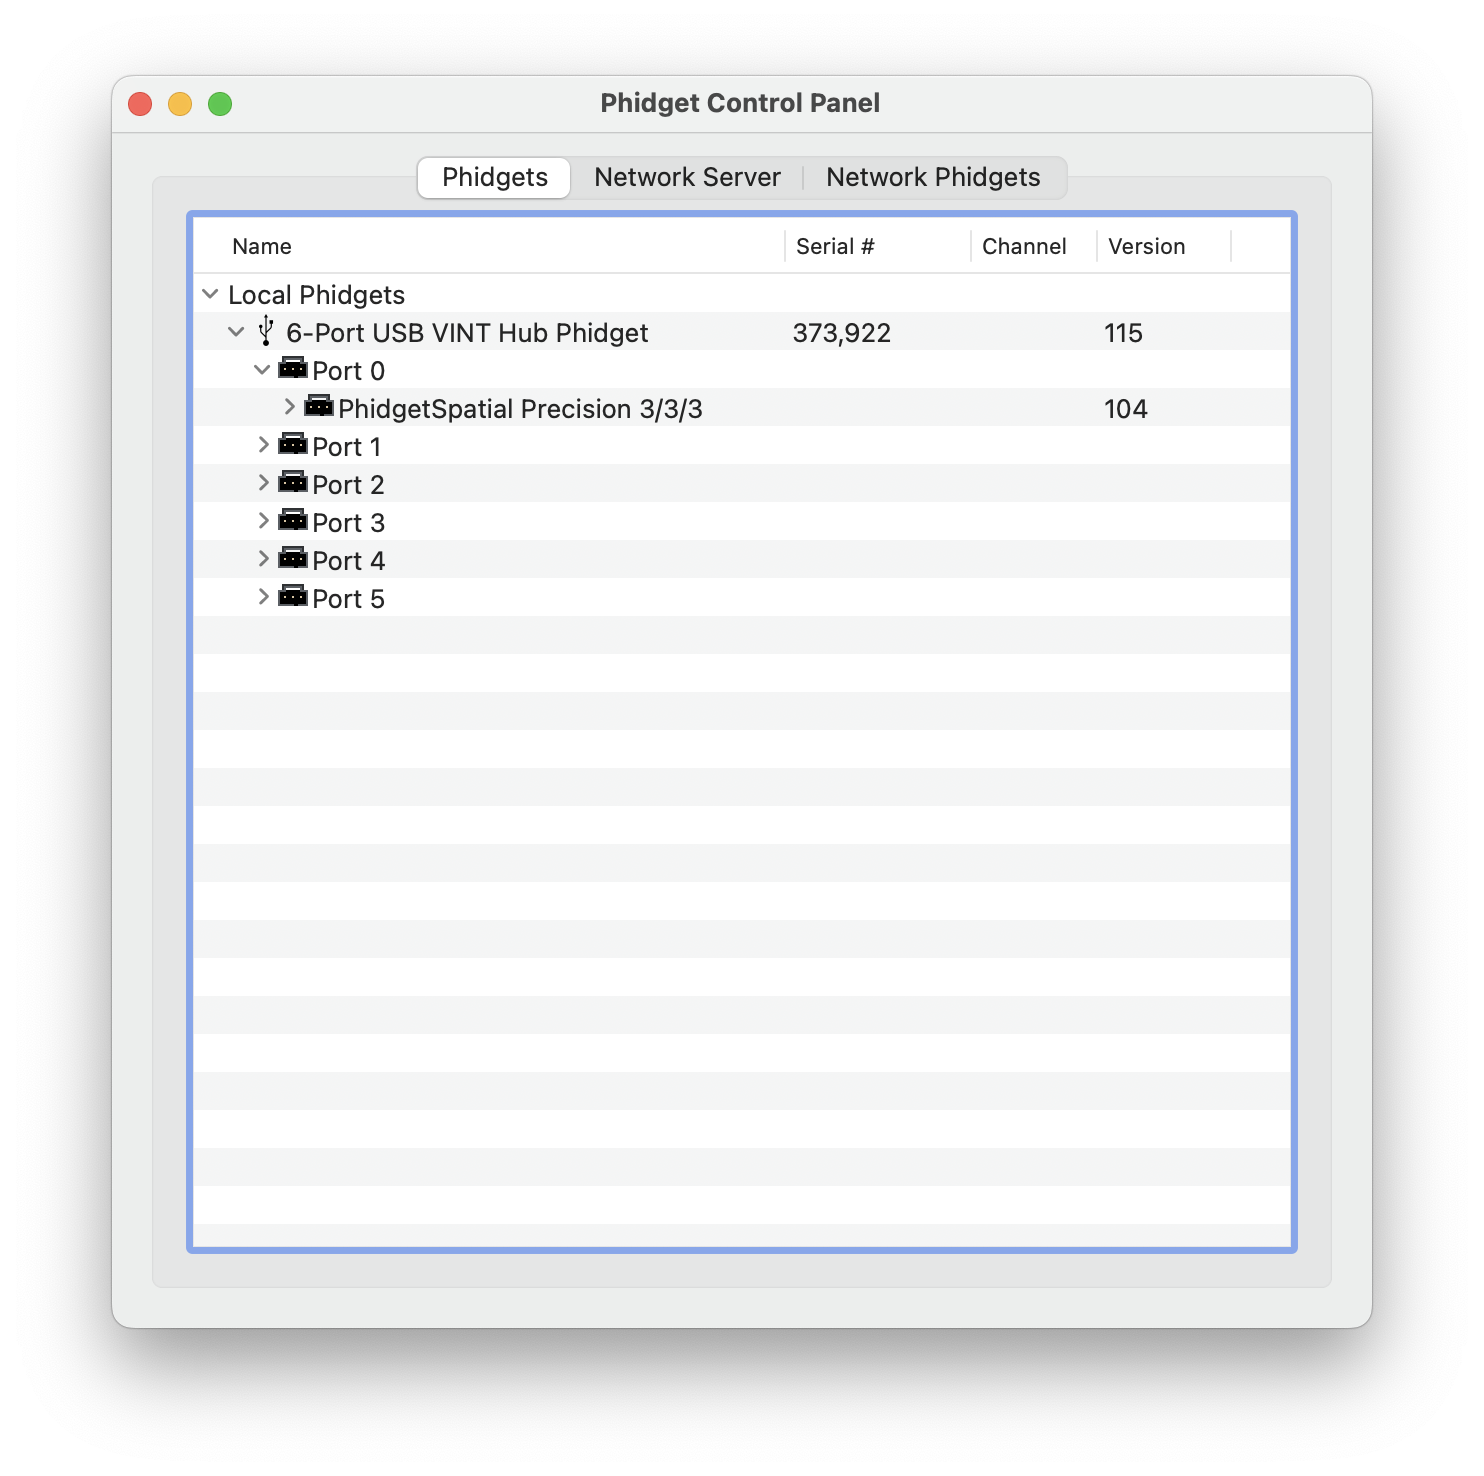
The Phidgets tab shows the list of Phidgets currently physically attached to the computer and their firmware version. It also lists the serial number that can be used in software to open a specific Phidget when more than one of the same type are connected at once. You can double click on a Phidget device in the Phidget Control Panel to open up an example program for the device.
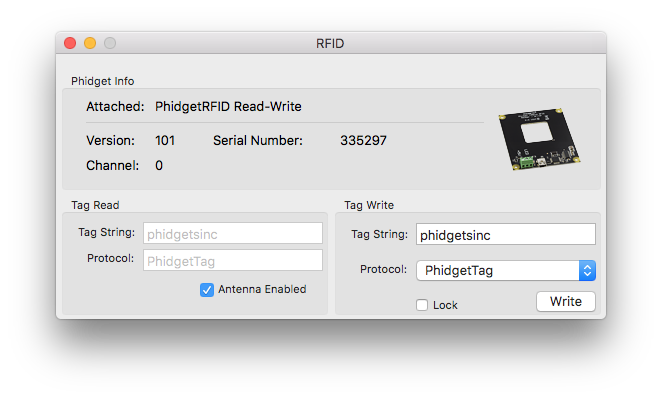
In the above screenshot, the RFID example was opened. These examples are intended for demonstration and debugging purposes. If you have not yet already, please see the Getting Started guide for your device, which is found in its user guide. It is important to keep in mind that when an example Phidget application is opened from the Phidget Control Panel or opened from any of your Phidget applications that you develop, it holds a lock on the Phidget. This prevents any other program from accessing the Phidget. Please ensure that this example application is closed (the Phidget Control Panel itself can still be running) before running your own applications.
Updating Firmware
If a Phidget shows up in red on the list in the Phidgets tab, it means the firmware is out of date. Double click on the Phidget to be given an option to apply the update. If you choose not to update, you can still use the control panel example afterwards.
Network Server Tab
The next tab is the Network Server tab, which allows you to control Phidgets over a network.
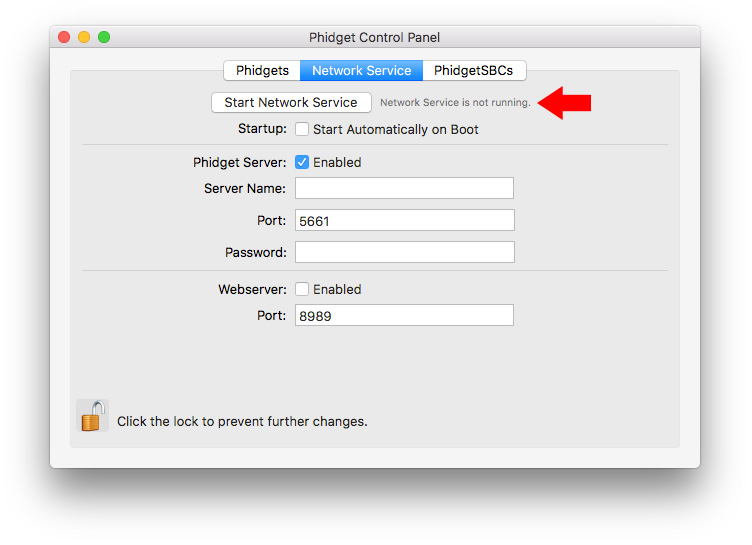
The settings are as follows:
Start Network Server: This button will start or stop the Network Server. The text to the right of the button will display the current status of the Network Server.
Startup: By checking the box, the Network Server will start automatically when the computer boots. Otherwise, you'll have to manually start the Network Server every time you want to use it.
Phidget Server Enabled: Check this box to enable the Phidget server, which is the part of the Network Server that makes the Phidgets connected to this computer accessible to other devices on your network.
Server Name: When other computer's Phidget Control Panel applications see your Phidget Server, this is the name that will be displayed. When writing code, you can also locate remote Phidgets based on the name of the server hosting them.
Port: The port used by the Phidget network server. Default is 5661.
Password: Optional password that will be required to attach to the Phidgets on this server.
Webserver Enabled: Check this box to enable the Webserver. The Webserver allows you to host a webpage that will have access to the Phidgets through languages like JavaScript. For more information, have a look at the Phidget Network Server page.
Port: The port used by the Phidget web server. Default is 8989.
In order to make changes to any of these settings, you'll need administrator privileges.
PhidgetSBC Tab
The last tab is the PhidgetSBC tab, which displays the complete list of PhidgetSBCs connected to the network.
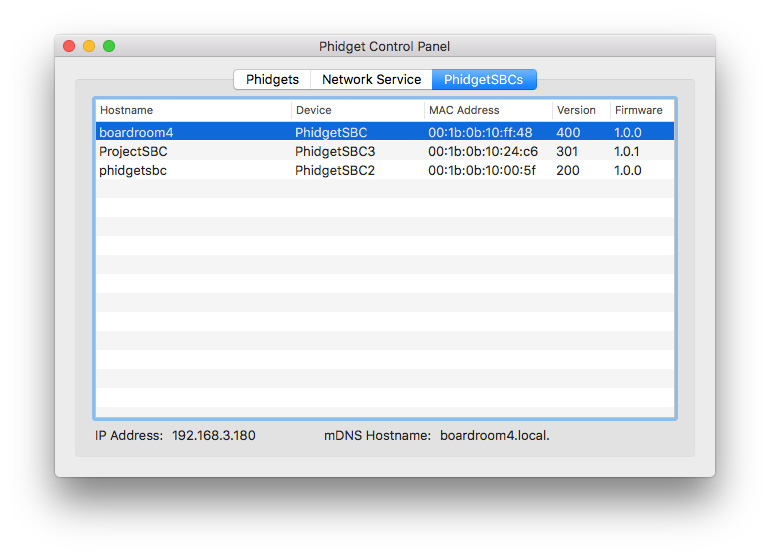
You can double click on the PhidgetSBC to bring up the PhidgetSBC Administration Console log-in page in your default browser.

The PhidgetSBC Administration Console is where you can go to configure the PhidgetSBC. For more details, please see the User Guide for your SBC.
Linux
There is no graphical interface like the control panel on Linux.
See the OS - Linux page for more information on how to get started with Phidgets on Linux.
