|
Notice: This page contains information for the legacy Phidget21 Library. Phidget21 is out of support. Bugfixes may be considered on a case by case basis. Phidget21 does not support VINT Phidgets, or new USB Phidgets released after 2020. We maintain a selection of legacy devices for sale that are supported in Phidget21. We recommend that new projects be developed against the Phidget22 Library.
|
Template:Compasscalibration: Difference between revisions
(Created page with "====Magnetic Error Correction (Calibration)==== In order to get numbers of useful accuracy from the 1056's compass you will need to provide calibration parameters. To make d...") |
No edit summary |
||
| Line 1: | Line 1: | ||
====Magnetic Error Correction (Calibration)==== | ====Magnetic Error Correction (Calibration)==== | ||
In order to get numbers of useful accuracy from the | In order to get numbers of useful accuracy from the {{{1}}}'s compass you will need to provide calibration parameters. To make determining them easy, we distribute a program with our drivers that does this for you. | ||
'''To calibrate your compass:''' | '''To calibrate your compass:''' | ||
| Line 15: | Line 15: | ||
[[image:calibration4.png|thumb|200px|link={{SERVER}}/wiki/images/0/02/Calibration4.png]] | [[image:calibration4.png|thumb|200px|link={{SERVER}}/wiki/images/0/02/Calibration4.png]] | ||
*Enter the magnetic field value into the calibration program. Note that it wants the field strength in Gauss, not nT like the website gives you. 1T = 10000 Gauss so you can convert easily enough. | *Enter the magnetic field value into the calibration program. Note that it wants the field strength in Gauss, not nT like the website gives you. 1T = 10000 Gauss so you can convert easily enough. | ||
*Depending on what your application is this step as well as the next step might be a bit different. If you are intending on mounting the | *Depending on what your application is this step as well as the next step might be a bit different. If you are intending on mounting the {{{1}}} onto a large vehicle such as a car then you should mount the 1056 securely to the vehicle in its final intended position then check the 2-axis bubble, click the 'Start' button. | ||
*If you are using a smaller, more easily handled vehicle such as a small robot (something you could physically pick up) you will mount the | *If you are using a smaller, more easily handled vehicle such as a small robot (something you could physically pick up) you will mount the {{{1}}} and use the 3-axis calibration instead. Click 'Start'. | ||
<br clear="all"> | <br clear="all"> | ||
[[image:calibration5.png|thumb|200px|link={{SERVER}}/wiki/images/6/67/Calibration5.png]] | [[image:calibration5.png|thumb|200px|link={{SERVER}}/wiki/images/6/67/Calibration5.png]] | ||
Revision as of 16:16, 6 September 2013
Magnetic Error Correction (Calibration)
In order to get numbers of useful accuracy from the {{{1}}}'s compass you will need to provide calibration parameters. To make determining them easy, we distribute a program with our drivers that does this for you.
To calibrate your compass:
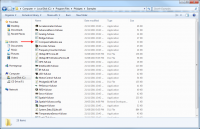
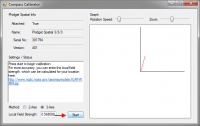
- Navigate to the Phidgets installation folder on your computer. Open the 'examples' folder and find the Compass Calibrator program.
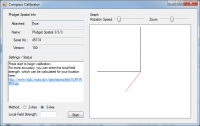
- Start the program and find the link in the Settings/Status text box. Go to the website listed. (http://www.ngdc.noaa.gov/geomag-web/#igrfwmm)
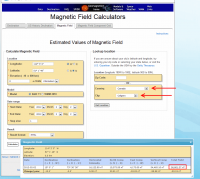
- Select your country and city. Click 'Get Location' and then 'Compute'. A table of values will show up in an overlaid window. The value you will need is the 'Total Field' value in nT.
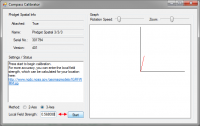
- Enter the magnetic field value into the calibration program. Note that it wants the field strength in Gauss, not nT like the website gives you. 1T = 10000 Gauss so you can convert easily enough.
- Depending on what your application is this step as well as the next step might be a bit different. If you are intending on mounting the {{{1}}} onto a large vehicle such as a car then you should mount the 1056 securely to the vehicle in its final intended position then check the 2-axis bubble, click the 'Start' button.
- If you are using a smaller, more easily handled vehicle such as a small robot (something you could physically pick up) you will mount the {{{1}}} and use the 3-axis calibration instead. Click 'Start'.
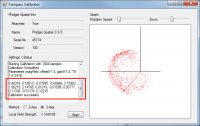
- Rotate the compass around (including whatever equipment you have mounted it to) such that the red dots being generated on screen outline as much of a full sphere (in 3-axis) as possible. This will take several minutes. Being perfect is not necessary but try to be as thorough as time permits. Once done, click stop.
- If you are in a large vehicle, you will be aiming to fill out a disc instead of a sphere. This can be done by simply driving around for a few minutes making sure to do complete turns in the process.
- Take the parameters displayed in the text box and use them for your compass. For example in C#:
setCompassCorrectionParameters(0.51075, 0.18820, -0.07456, -0.02209, 1.87163, 1.87640, 2.12565, -0.04000, -0.04084, -0.03552, 0.09073, -0.04258, 0.11056);

